
DIY Calendar
- Sochenda Aok

- Feb 1, 2018
- 1 min read
Not buying the new calendar on the market is not about saving little money but it is about saving the environment. A lot of waste in your house can be reused and recreated to be something useful. For example, I eat a lot of cereal so I have a lot of cereal boxes. 2018 comes I need a new calendar. Then I have an idea of recreating the box into my new calendar. I can design it as I want and make it as small or as big as I like. Ohh! For you who have kids, instead of buying them a new calendar, let them design it themselves. Pull out there creativity mom! or dad!
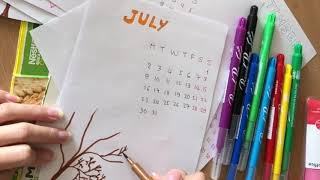
Below are the video and written steps of this DIY calendar.
Step1: Cut the box open and cut the edges of the box (You can use any box, not just cereal box). Then cut it in half from small end to small end. Only one half is needed for one calendar. Step2: You will get 4 rectangles (2 smalls and 2 bigs). Cut out one small rectangle. Make sure you get 3 rectangles connected to each other (1 small in between 2 big rectangles). Step3: Cut 12 sheets of paper as the size of the big rectangles. Step4: Design each sheet as you like. You can find the calendar on your phone. Step5: Punch some holes along both small ends of the box and the paper. Step6: Tie the paper and the box with string and you are done!
Hope you enjoy it. Thank you!


Comments